
If you've ever found yourself digging through emails for Report_Final_v3_for_real_this_time.xlsx, you already know the core problem with the old way of working. Moving from Excel to Google Sheets isn't just about swapping one spreadsheet for another; it's about escaping that version-control nightmare for good.
It’s a shift toward sanity, real-time collaboration, and a workflow that doesn’t make you want to pull your hair out.
Why Teams Are Actually Switching from Excel to Sheets

Let's be honest—emailing spreadsheets back and forth is a recipe for disaster. It creates a confusing mess of file versions, wastes a ton of time, and pretty much guarantees someone will end up working from an outdated document.
Google Sheets gets rid of that entire headache by creating a single source of truth. The document lives in the cloud, so everyone on the team sees the exact same, most up-to-date version. No more duplicates, no more merging changes. Every edit is tracked automatically.
The Magic of Real-Time Collaboration
The real game-changer is having multiple people working in the same spreadsheet at the same time. Think about it: your marketing team is in a meeting, analyzing campaign results. Instead of one person screen-sharing, everyone can jump into the sheet, add their own insights, and build on each other's work live. No need to consolidate notes later.
This brings some killer practical benefits:
-
Instant Updates: When one person makes a change, everyone else sees it immediately. No more asking, "Are you in the latest version?"
-
Clear Workflows: You can see who's working on what, drop comments right next to the data, and tag colleagues with questions. It keeps conversations in context.
-
Faster Decisions: With everyone looking at live data, teams can analyze information and make calls on the spot, instead of waiting for someone to email an updated file.
This Isn't Just a Fad—It's a Major Trend
This shift is happening everywhere, and the numbers back it up. In 2025, enterprise adoption of Google Sheets shot up by a staggering 9.3% year-over-year.
Even more telling, a recent study found that 54% of U.S. small businesses now prefer Google Sheets over Microsoft Excel for their daily tasks. We're seeing the same pattern in other major markets like the UK, Canada, and Australia.
The real win is moving from a static file trapped on someone's hard drive to a living document you can access from anywhere. For remote and hybrid teams, that's not just a nice-to-have; it's absolutely essential.
At the end of the day, switching from Excel to Sheets is about building a faster, more collaborative way to work with data. While Excel is still a beast for heavy-duty, complex analysis, Sheets is unbeatable when it comes to teamwork and streamlined workflows. If you're looking for more ways to level up your data processes, check out some of our other articles.
Simple Ways to Get Your Excel Files into Google Sheets
Getting your Excel files into Google Sheets doesn't have to be a headache. For those one-off tasks or if you're just getting your feet wet, the built-in manual methods are surprisingly effective and dead simple.
We'll walk through the two main paths for Mac users: a quick upload via Google Drive and using the more powerful "Import" function directly inside Google Sheets. Think of these as your foundational skills for moving data around without any fancy tools.
The Google Drive Drag-and-Drop Method
This is probably the most intuitive way to get it done. If you can drag a file from one folder to another on your Mac, you've already mastered this. It's that easy.
Just open your Google Drive in a browser. Find the folder where you want your new Google Sheet to live, then drag your .xlsx, .xls, or .csv file straight from Finder into the browser window. Google Drive takes it from there and uploads it automatically.
Once it's uploaded, you've got two options:
-
Keep it as an Excel file: Double-click the file in Drive, and it opens in a preview mode. You can make some basic edits, but it’s not the real collaborative Google Sheets experience. This is best for a quick peek.
-
Convert to a Google Sheet: This is what you're here for. Right-click the uploaded file, hover over Open with, and pick Google Sheets. Boom. A brand new, fully editable Google Sheet is created, leaving your original Excel file safe and sound in Drive.
This approach is perfect when you're already organizing files in Drive and decide on the fly to convert something.
Using the Import Feature in Google Sheets
What if you're already working inside a Google Sheet and need to bring in new data? That's where the dedicated "Import" function shines. It gives you way more control over where the data lands, which is critical when you're updating existing reports.
From an open Google Sheet, just go to File > Import. An upload window pops up, letting you drag your Excel file in or browse for it on your Mac.
After you upload, Google gives you a few powerful choices for how to handle the incoming data. This is where you can get precise.
Be careful here. Choosing the right import option is key to avoiding that sinking feeling of accidentally wiping out your work. Replacing a current sheet, for example, is a permanent action that a quick Cmd+Z can't undo. Always double-check your selection.
Understanding Your Import Options
When you import a file into an existing spreadsheet, you'll hit a fork in the road. Each option has a very specific job.
Here’s a quick breakdown of what happens when you import a file into an existing Google Sheet.
Choosing Your Manual Import Option in Sheets
| Import Option | What It Does | Best Used For |
|---|---|---|
| Create new spreadsheet | Generates a completely separate Google Sheet from your uploaded file. | The safest bet. Perfect for starting a new project without messing with anything you're currently working on. |
| Insert new sheet(s) | Adds the data from your Excel file as new tabs (sheets) within your current Google Sheet. | Great for consolidating related data, like dropping this month's sales figures into your annual report workbook. |
| Replace current sheet | Completely overwrites all the data in the specific tab you're viewing with the data from your Excel file. | Use this with caution. It's for updating a specific dataset, like refreshing a weekly dashboard with the latest numbers. |
These options give you the flexibility to either start fresh or merge new information into your existing workflows without starting from scratch.
Getting Excel files into the Google ecosystem has gotten much smoother over the years. As of 2025, you can often just upload an .xlsx file to Drive and let the platform handle the conversion automatically. It does a decent job of preserving most formatting and data, making it a go-to for teams moving into Google's collaborative tools. You can learn more about how different platforms handle these conversions.
Of course, if you're dealing with CSV files, that's a whole different beast with its own set of challenges. If you find yourself frequently wrestling with CSV exports, checking out a brutally honest guide to converting CSV into Sheets can save you from a world of formatting pain.
Automating Conversions from the Command Line
Look, if you're converting the same Excel or CSV file every single week, the manual drag-and-drop process gets old. Fast. Clicking through a bunch of menus for a weekly sales report or a daily analytics export just feels clunky and inefficient. For a much faster, repeatable workflow on macOS, you can—and should—turn to the command line.
This approach lets you skip the browser entirely. Think about it: you get a new CSV export from your marketing platform. Instead of opening Drive, digging through folders, uploading the file, and then converting it, you just run a single command in your terminal. This little bit of setup pays off big time in saved clicks and mental energy.
This diagram really nails the journey a file takes from your local machine to a live, editable Google Sheet.
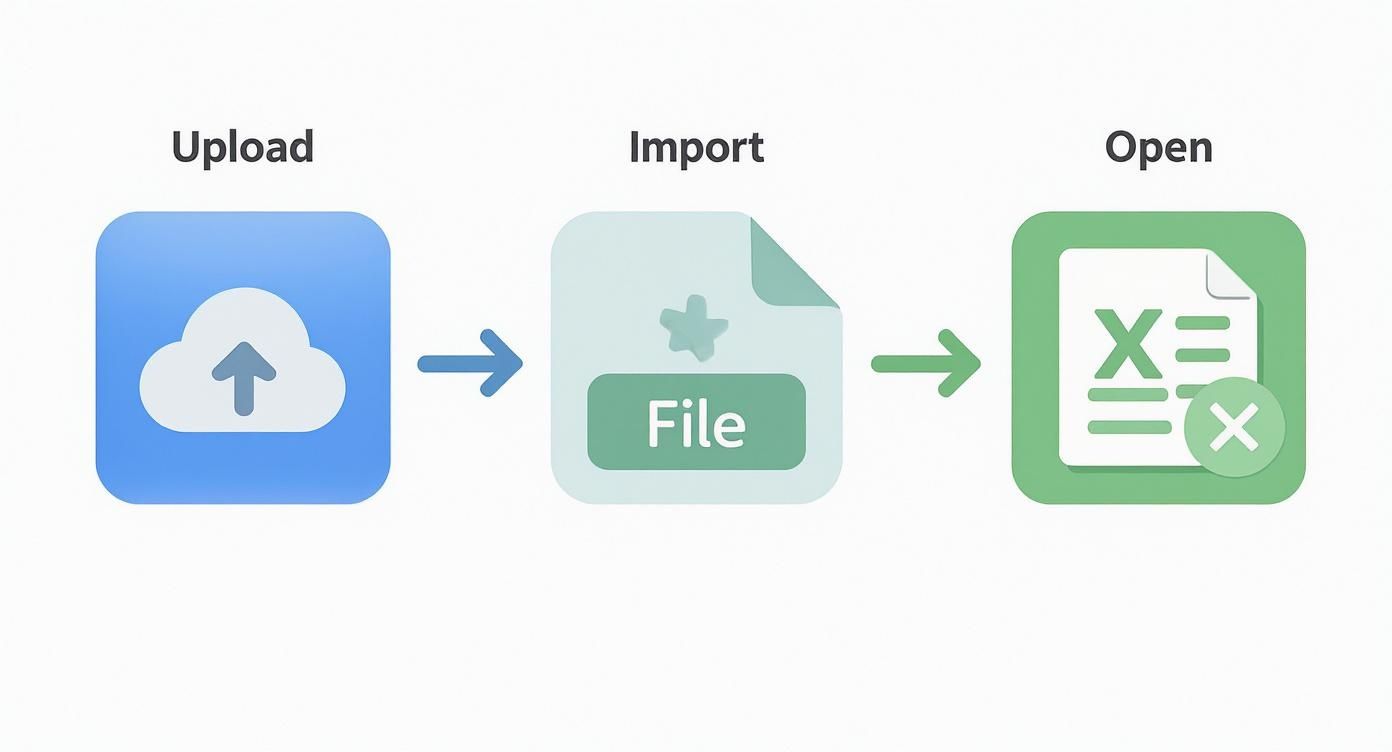
It breaks down the manual conversion into three separate actions, showing exactly where a good command-line tool can step in and combine them into one seamless step.
Getting Started with a Command-Line Tool
To pull this off, you need a utility that can talk to your Google account from the terminal. One of the best options out there for Mac users is a tool called CSVtoSheets. It’s built specifically for this job, handling all the messy authentication and upload logic behind the scenes so you don't have to.
Installing it is dead simple if you already have Homebrew, the go-to package manager for macOS. If you're a power user and don't have Homebrew yet, you're missing out, but let's assume you're already set up.
Just pop open your Terminal app and run this one command:
brew install csvtosheets
Homebrew takes care of the rest. Once it's finished, there’s a quick, one-time setup. The first time you run the tool, it needs you to authorize it with your Google account.
This process is straightforward:
-
You’ll run a command like
csvtosheets --authorize. -
Your browser will pop open to a standard Google login page.
-
You grant the application permission to access your Google Drive and Sheets.
This creates a secure token on your machine so you don’t have to log in every single time. It's a classic one-and-done setup.
Don't worry about the security here. Any reputable tool uses Google's official OAuth protocol. This means the app never sees or stores your password—it only gets a permission token that you can revoke anytime from your Google account settings.
A Practical Command-Line Workflow
Once you're authorized, converting a file is as simple as telling the tool which file to upload. Let's say you have a weekly sales report named weekly-sales-report.csv sitting on your desktop.
To convert it, you’d navigate to your desktop in the terminal (cd ~/Desktop) and then just run:
csvtosheets weekly-sales-report.csv
That's it. The tool uploads the CSV, automatically converts it into a brand new Google Sheet, and prints the URL of that new Sheet right there in your terminal. You can just copy and paste that link into your browser. No more manual steps.
For those who want to dig deeper, you can explore the CSVtoSheets download and documentation to find more advanced options like specifying a folder or sheet name.
This method is an absolute game-changer for recurring tasks. You could even script it to watch a folder for new files and automatically upload them the second they appear. For anyone handling regular data exports, mastering this command-line approach turns a tedious chore into a swift, automated action that will save you a shocking amount of time.
Keeping Your Formulas and Formatting Intact
This is where a simple file upload can get messy. When you convert Excel to Google Sheets, you’re not just moving data around. You’re translating a whole ecosystem of formulas, conditional formatting, and logic from one platform's "language" to another.
While your basic SUM formulas and cell colors usually survive the trip just fine, the more complex your spreadsheet is, the more you need to pay attention. The goal is to make sure all the intelligence you built into the original file doesn't get lost in translation. Knowing the potential pitfalls before you start can save you hours of headaches later.
Navigating Formula and Function Differences
At a glance, Excel and Sheets formulas look the same. For the most part, they are. Your bread-and-butter functions like SUM, AVERAGE, and COUNT will transition perfectly. But the devil is in the details, and subtle differences pop up with more advanced functions.
Take VLOOKUP, for example. The syntax is identical, but Excel is often more forgiving of small errors or mismatched data types. Google Sheets is stricter. A formula that worked perfectly in Excel might spit out an #N/A error in Sheets just because of a minor formatting issue that Excel was happy to ignore.
Here are a few common areas where formulas can break down:
-
Array Formulas: In older Excel versions, you had to hit
Ctrl+Shift+Enterto make array formulas work. Google Sheets handles arrays more natively with functions likeFILTERandSORT, so that old-school Excel logic might not translate one-to-one. -
Function Names: It's rare, but some functions have slightly different names or arguments. If something isn't working, the first step is to double-check it against the official Google Sheets function list.
-
Query Language: Google Sheets has the incredibly powerful
QUERYfunction, which has no direct equivalent in Excel. If you're moving a file from Sheets to Excel, this is a huge problem. But coming from Excel to Sheets, you're in the clear—though you'll find Excel's Power Query is a different beast entirely.
The Hard Truth About Macros and Pivot Tables
This is a big one. If your Excel workflow is built on Visual Basic for Applications (VBA) macros, you need to hear this loud and clear: they will not work in Google Sheets. Period.
VBA is Microsoft's proprietary language. The Google Workspace equivalent is Google Apps Script, which is based on JavaScript. While you can replicate almost any macro's function in Apps Script, it’s a complete rewrite from scratch. There’s no magic button to convert them automatically.
Thankfully, pivot tables are a much better story. They usually convert quite well. You might find, however, that advanced Excel features like Slicers, Timelines, or connections to external data models don't have a direct counterpart in Sheets. It's absolutely crucial to rebuild and test your pivot tables after the conversion to make sure they’re still pulling the right data and filtering the way you expect.
The move from Excel to Google Sheets isn't just for small businesses anymore. As of 2025, major companies are shifting to Google Workspace as part of their cloud strategy, forcing them to convert massive libraries of legacy Excel files. Learn more about how businesses are tackling this challenge on a large scale by reading about efficiently migrating Excel files on discuss.google.dev.
This broader trend highlights just how important a solid verification process is. Before you convert anything, your checklist should include identifying every macro, complex formula, and external data connection in your file. By knowing what to look for, you can systematically comb through your new Google Sheet, apply targeted fixes, and ensure your data remains reliable.
Stop Winging It: Build a Smarter Conversion Workflow
When you have to convert Excel to Google Sheets more than once a week, a one-off, haphazard approach just doesn’t fly. It’s a recipe for wasted time and costly mistakes, especially when you’re dealing with critical business reports. Moving to a structured workflow is the single best thing you can do.
This isn't about setting up some complex automation that'll take you a week to figure out. It’s about building a few simple, smart habits that turn a repetitive chore into a swift, error-proof process. A good system means consistency, which makes your data more reliable and your life a whole lot easier.
Get Your Naming Convention Straight
First things first: stop the file-naming madness. If your desktop is a graveyard of files like Report_v2_final.xlsx and Sales_FINAL_use_this_one.csv, you’re setting yourself up for failure. A clear, consistent naming convention is a ridiculously simple change with a massive impact.
Think about what you need to know just by looking at the filename. A solid structure usually includes:
-
What it is:
Weekly-Sales,Q3-Analytics -
When it's from:
2024-09-25 -
Where it came from:
Salesforce,GoogleAds
A file named Weekly-Sales_2024-09-25_Salesforce.xlsx tells you the whole story in a split second. This kind of organizational discipline stops you from uploading the wrong report and makes finding historical data a breeze instead of a frantic search.
This isn’t just about being tidy. It's about building a predictable system that cuts down on mental friction. When you don't have to second-guess which file is the right one, you can focus on what actually matters—the data.
Use a Dedicated "Import" Folder
Here's another game-changer: create a dedicated folder in your Google Drive called "To Be Converted" or "Import Staging." Instead of dumping new files directly into their final destination, you’ll use this folder as a staging area.
This one small step acts as a crucial buffer. It keeps your main project folders clean, so they only contain finished, ready-to-use Google Sheets—not a messy mix of original Excel files and their converted twins.
It also centralizes your work. You can see everything that needs to be converted in one place, letting you process them in efficient batches. Once a file is successfully converted and moved to its permanent home, you just delete the original from the import folder. Clean, simple, and effective.
The Lingering Questions: What to Expect When Converting
Even when a project feels straightforward, a few "what ifs" always seem to crop up. Converting from Excel to Google Sheets is no different. You're bound to hit a few practical hurdles that make you pause.
Let's clear the air and tackle the most common questions head-on so you can move forward with confidence, no matter how gnarly that spreadsheet looks.
Can I Convert an Excel File with Multiple Tabs?
Absolutely. This is probably one of the smoothest parts of the whole process. When you bring an Excel workbook with a bunch of tabs into Google Sheets, it intelligently creates a corresponding sheet for each one.
Better yet, it keeps the original tab names and their order intact. This is a lifesaver for complex financial models or detailed project trackers that rely on that multi-sheet structure to make sense. It just works.
Is There a File Size Limit for Conversion?
Yes, but it's not about megabytes; it's about cells. Google Sheets has a hard ceiling of 10 million cells for the entire spreadsheet (that's all tabs combined).
Here's a pro tip: Even if your file is technically under the cell limit, an enormous or incredibly complex Excel file can still choke during the import. Worse, it might become painfully sluggish to use afterward. If you're dealing with a monster file, do yourself a favor and split it into smaller, more focused workbooks before you even try to convert it.
A little prep work here will save you a world of frustration with slow-loading sheets down the line.
Will My Excel Macros Work in Google Sheets?
This is a big one: no, they will not. It's a critical point to understand before you start.
Excel macros are built with VBA (Visual Basic for Applications), a language exclusive to Microsoft's world. Google Sheets, on the other hand, runs on Google Apps Script, which is based on JavaScript. They are fundamentally incompatible, like trying to run a PlayStation game on an Xbox.
To get that same functionality back, you'll have to rewrite your scripts from the ground up in Google Apps Script. There's no magic button or automatic converter for this.
What Happens to My Charts and Graphs?
For the most part, you'll be fine. Basic charts and graphs—your standard bar charts, line graphs, and pie charts—usually convert over pretty well.
However, if you've got highly customized or complex visuals in Excel, they might lose some of their specific formatting or just look... a bit off. It’s always smart to give all your charts a quick once-over after the conversion. You'll likely need to spend a few minutes tweaking them in Google Sheets to get them looking exactly right again.